Gigabyte BRIX PC
Simon Brown • August 13, 2020
Teeny-Tiny PC from Gigabyte
I received an offer from https://mini-itx.com, and as a developer can never have enough computers I bought this and added 8 GB RAM. I put Windows 10 professional on.
The Spec
Gigabyte Brix GB-BLCE-4000C fully assembled PC. The Gigabyte Brix GB-BLCE-4000C features a dual core Celeron CPU, ram up to 8GB Ram. It is a total fanless PC.
Base specification (this is configurable using options)
- Intel Celeron N4000 2.6GHz
- 4GB Ram DDR4
- 500Gb Hard Disk
- Gigabit lan (Realtek RTL8111HS)
- Includes Wireless- Intel® Dual Band Wireless-AC 3168 & Bluetooth
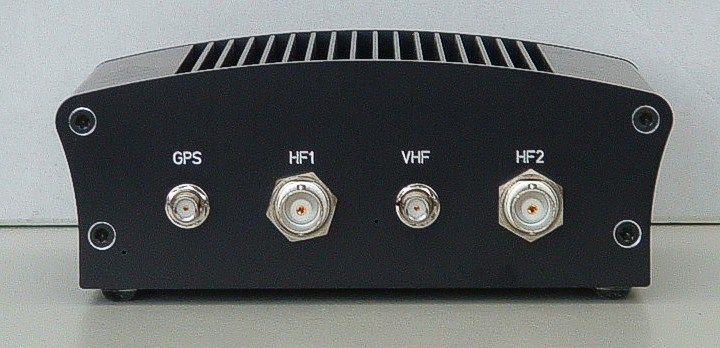
- Intel UHD Graphics 600 onboard, dual display capable with HDMI and VGA outputs.
- Front 1 x Power Button, 1 x USB3.0, 1 x USB3.0 type-C
- 1 x Headphone Jack, 1 x Microphoce Jack
- Rear 1 x HDMI(1.4b), 2 x USB 3.0, 1 x RJ45, 1 x VGA
- Side 1 x Kensington lock slot
- Dimension 56.22 mm x 103 mm x 116.52 mm (2.21″ x 4.06″ x 4.59″)
- Vesa mountable bracket included Supports 75 x 75 and 100 x 100 mm
- 1 year parts and labour warranty
System:
- Don't forget - this is a two core N4000 Celeron chip!
Verdict:
- Hardware build quality is excellent.
- Looks very good.
- I received a 240 GB SSD instead of 120 GB as Gigabyte had run out of 120 GB!
- Plenty of CPU power considering only two cores.
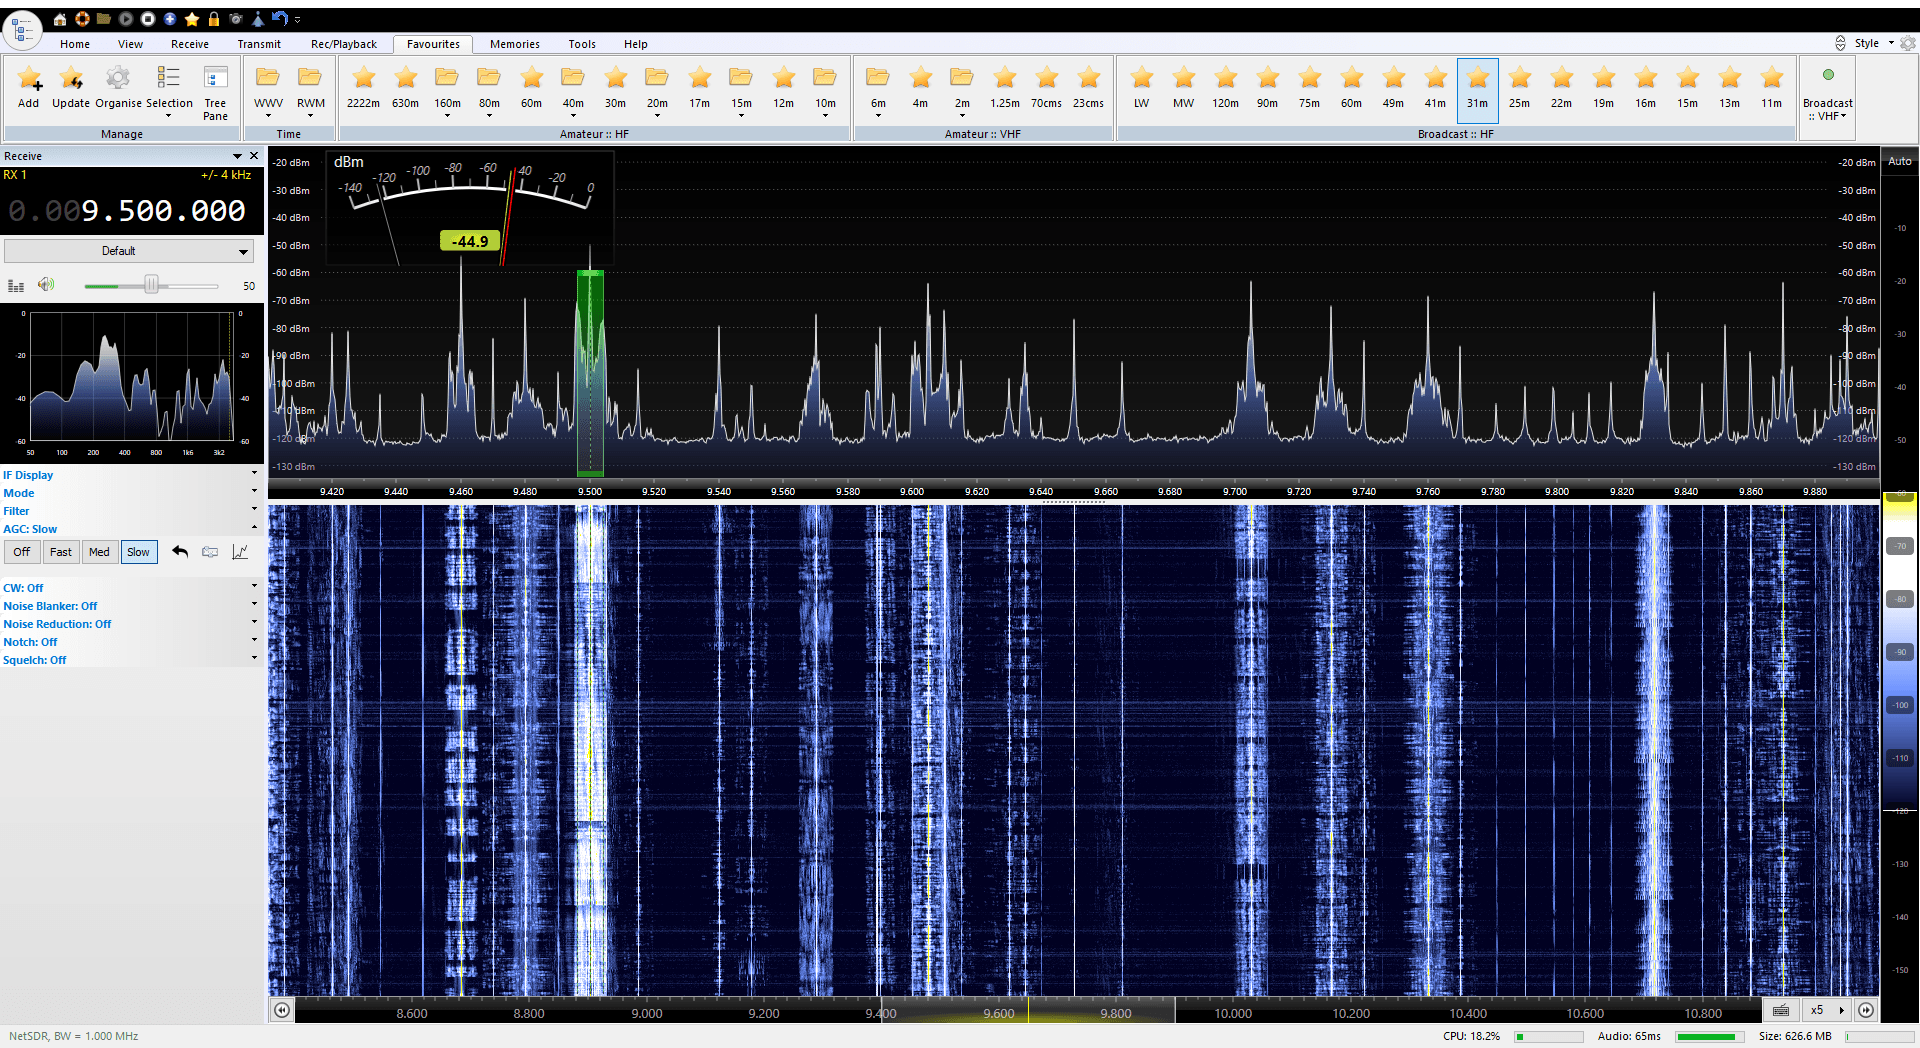
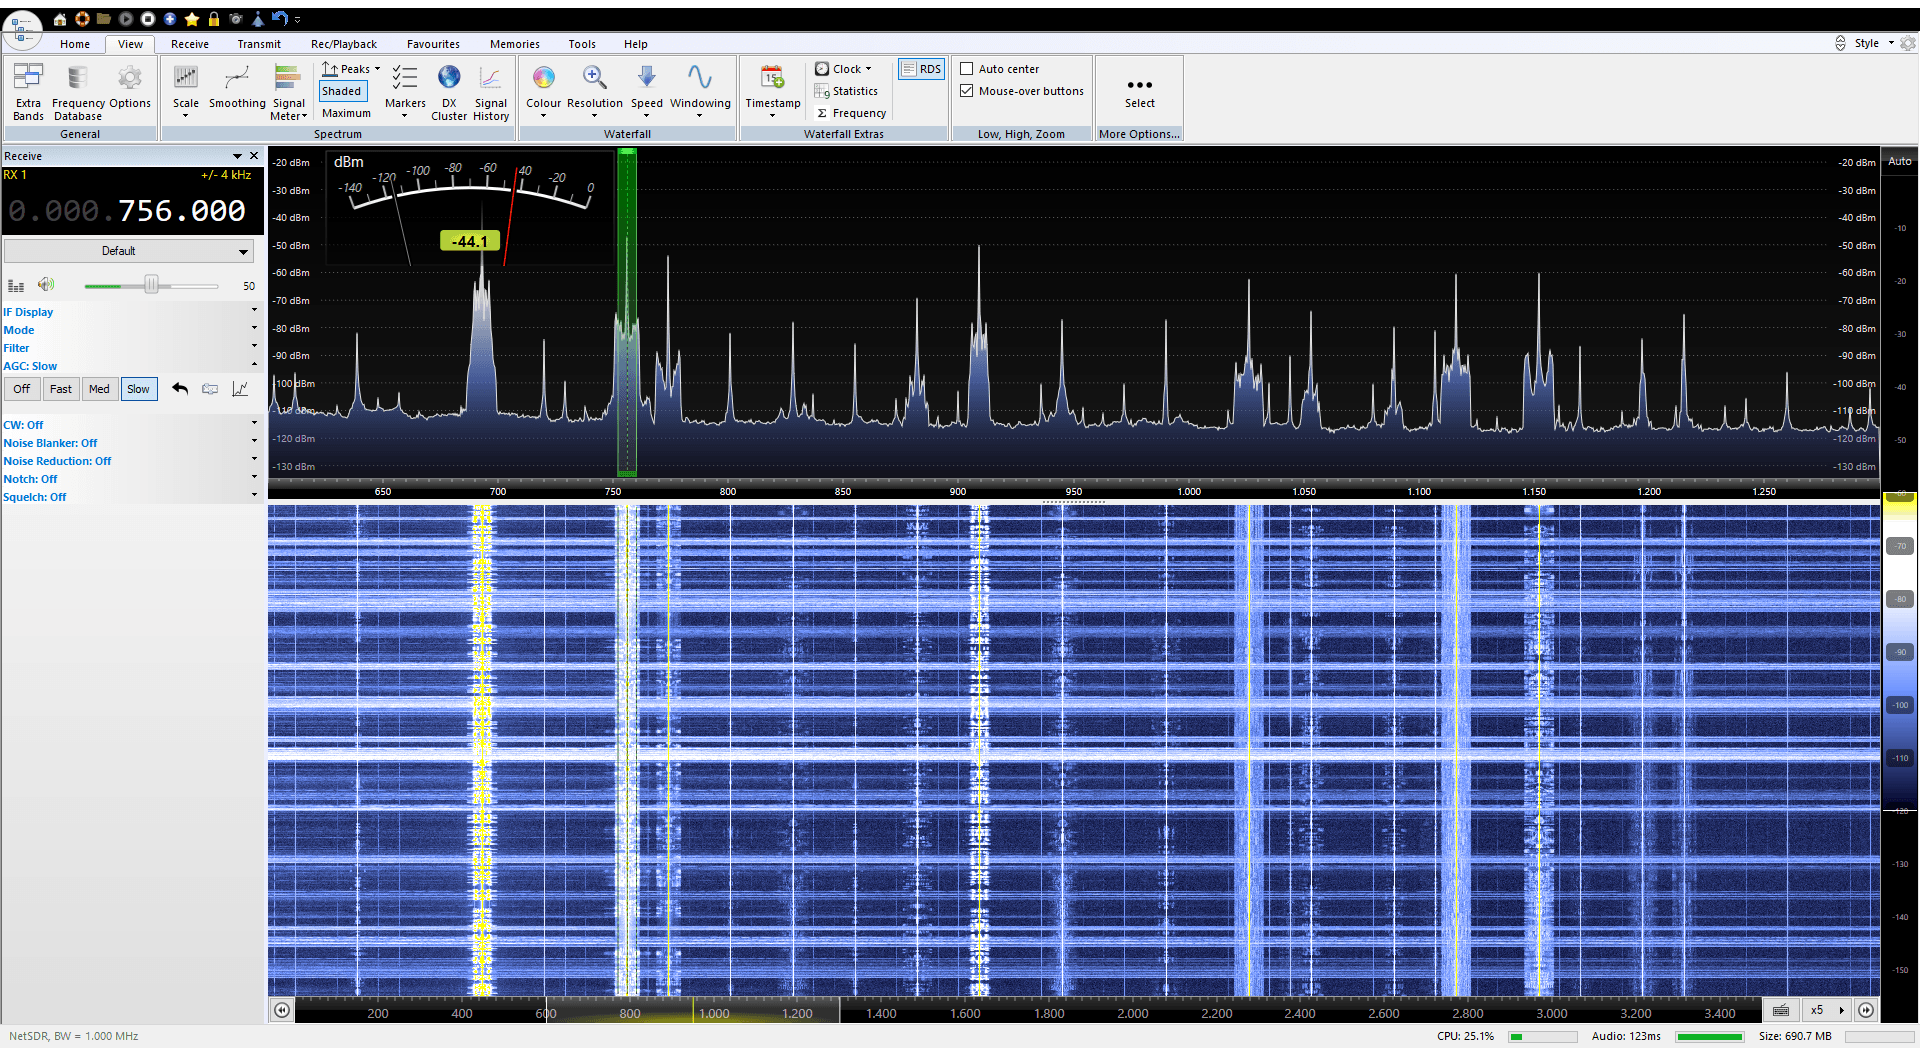
- Runs a NetSDR at 1 MHz bandwidth acceptably, also fine at 2 MHz bandwidth.
- Graphics on a HD monitor is usable but not fantastic.
- Would struggle to run another resource-intensive program such as WSJT.
- Would be fine as a server for one or two SDRs.
Future Use
- This will be used for running the g4eli.sdr-radio.com DX Cluster sometime in 2020.


SDR Television v1.1.2 June 12th, 2026: Add option to disable audio, thus making more bits available for video, this is for use in DATV contests. Note: 66 ksps sample rate is still experimental, will be improved. Downloads are at the bottom of this page.
SDR Television v1.1.1 June 9th, 2026: Fixes a fatal bug in the Settings, Camera page. Downloads are at the bottom of this page.
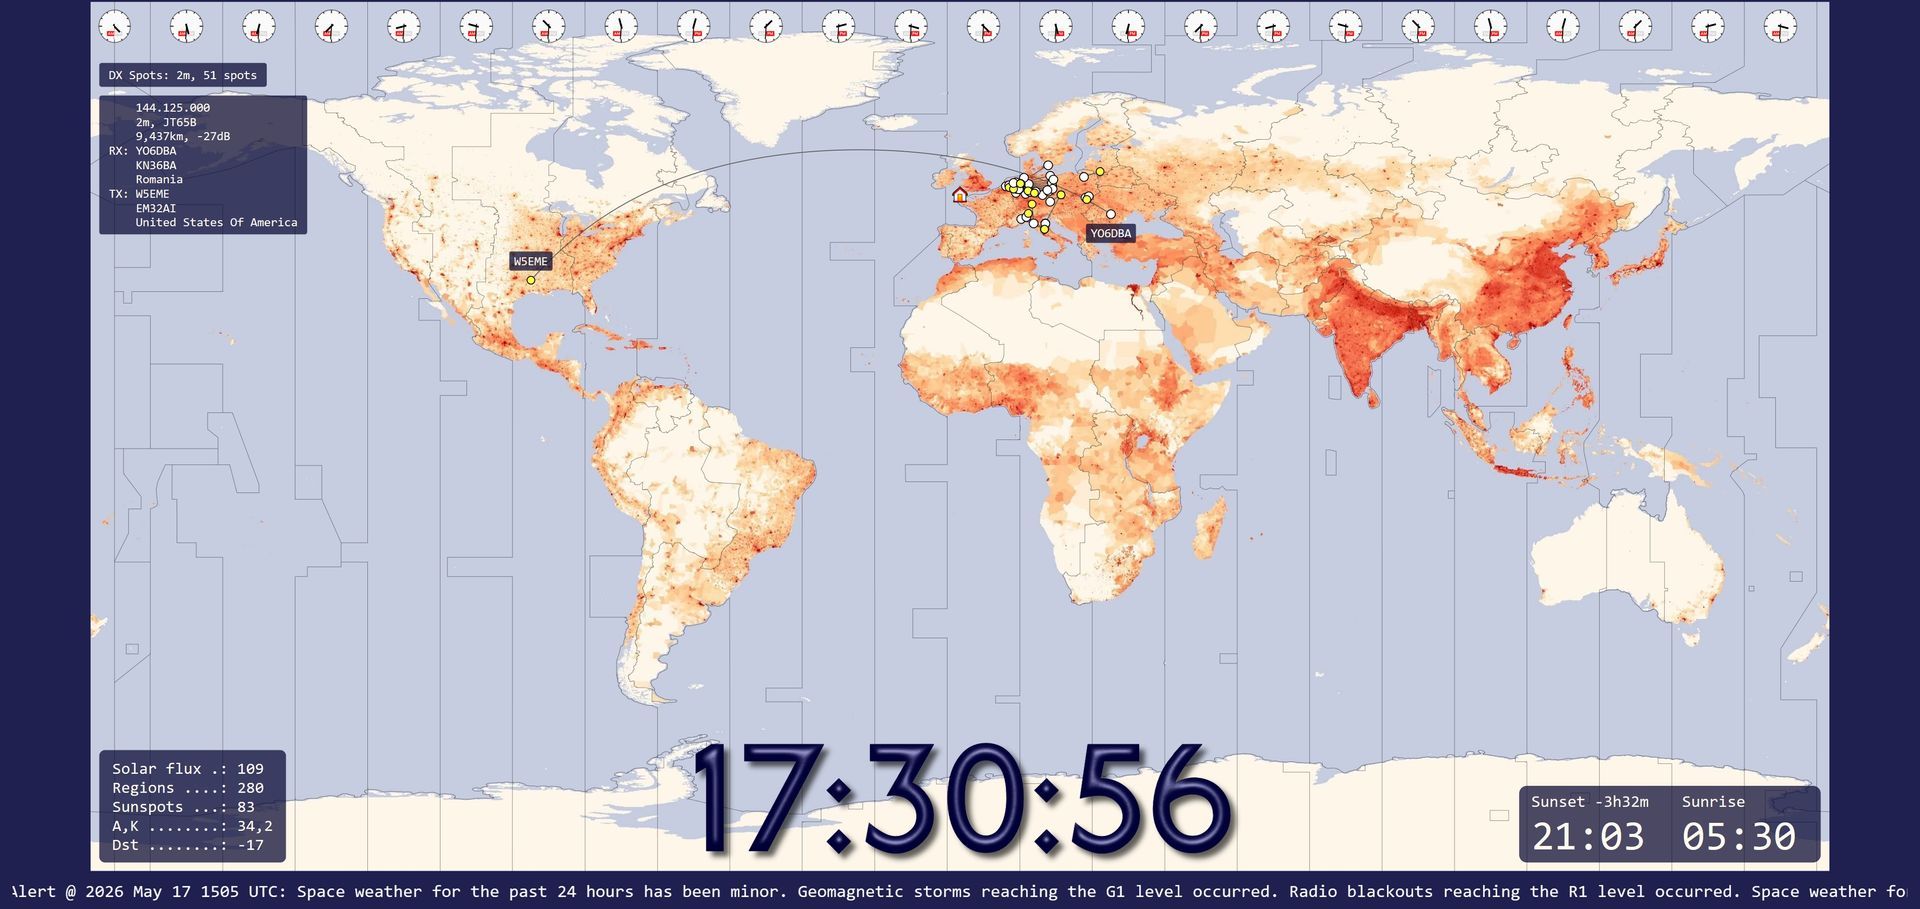
Version 1.6.2 This release fixes two bugs in the new DX Spot feature. The spot age logic incorrectly affected spot display. When the map was zoomed, station markers off the map would be displayed at the top left (0, 0). Downloads are on the World Map page . Version 1.6.1 This release fixes two fatal bugs in the new DX Spot feature. When the graphics engine is restarted, resources are correctly released. Fixed a resource leak when processing the MoseMove logic. Downloads are on the World Map page . Version 1.6 This release adds the display of DX Spots. Display spots are submitted to PSK Reporter which in turn are relayed by a MQTT Broker running on a high performance Akamia node. Spot Format Each spot consists of these fields: Sequence Frequency Band Mode Signal level Time stamp Sending station call, square, country Receiving station call, square, country Note: The country is the ADIF country. Spots are displayed as they arrive, currently no on-demand database. Bandwidth To reduce bandwidth from the broker, filtering is required for 80m up to and including 15m. Filtering requires at least one field below to be set in a definition: Receiver callsign, square or country. Sender callsign, square or country. Without filtering the bandwith from the broker could be excessive. For LF and VHF+ no filtering is required due to the lower number of spots sent on these bands. In a later version the bandwidth restriction may be reduced.
Version 1.6.1 This release fixes two fatal bugs in the new DX Spot feature. When the graphics engine is restarted, resources are correctly released. Fixed a resource leak when processing the MoseMove logic. Downloads are on the World Map page . Version 1.6 This release adds the display of DX Spots. Display spots are submitted to PSK Reporter which in turn are relayed by a MQTT Broker running on a high performance Akamia node. Spot Format Each spot consists of these fields: Sequence Frequency Band Mode Signal level Time stamp Sending station call, square, country Receiving station call, square, country Note: The country is the ADIF country. Spots are displayed as they arrive, currently no on-demand database. Bandwidth To reduce bandwidth from the broker, filtering is required for 80m up to and including 15m. Filtering requires at least one field below to be set in a definition: Receiver callsign, square or country. Sender callsign, square or country. Without filtering the bandwith from the broker could be excessive. For LF and VHF+ no filtering is required due to the lower number of spots sent on these bands. In a later version the bandwidth restriction may be reduced.
Version 1.6 This release adds the display of DX Spots. Display spots are submitted to PSK Reporter which in turn are relayed by a MQTT Broker running on a high performance Akamia node. Spot Format Each spot consists of these fields: Sequence Frequency Band Mode Signal level Time stamp Sending station call, square, country Receiving station call, square, country Note: The country is the ADIF country. Spots are displayed as they arrive, currently no on-demand database. Bandwidth To reduce bandwidth from the broker, filtering is required for 80m up to and including 15m. Filtering requires at least one field below to be set in a definition: Receiver callsign, square or country. Sender callsign, square or country. Without filtering the bandwith from the broker could be excessive. For LF and VHF+ no filtering is required due to the lower number of spots sent on these bands. In a later version the bandwidth restriction may be reduced.
SDR Television v1.1 May 18th, 2026: This is the official v1.1 release , code exactly the same as 1.0.16 which has survived testing for a few weeks. Lots of improvements since the last official kit. As with any software project, there's always room for improvements and new features, but for now here's a stable solution which works well with the QO-100 satellite. Many thanks to Sigi and the DATV test team. Downloads are at the bottom of this page.

SDR Television v1.0.14 April 12th, 2026: A new kit, lots of improvements since the last official kit. As with any software project, there's always room for improvements and new features, but for now here's a stable solution which works well with the QO-100 satellite. Many thanks to Sigi and the DATV test team. Downloads are at the bottom of this page.

SDR Television v1.0.9 March 13th, 2026: A new kit, lots of receive improvements since the last official kit. As with any software project, there's always room for improvements and new features, but for now here's a stable solution which works well with the QO-100 satellite. Many thanks to the DATV test team. Downloads are at the bottom of this page.
First Impressions